Getting started in fpv

Drones in first person view
FPV style drones are exhilarating and capable of capturing images unlike anything else. These style drones are still mostly home brew concoctions of various components, though there are a few companies out there selling complete ready-to-fly kits. On this page I’ll go over some of the basics of what I’m using, hopefully this will provide some guidance to anyone else looking to get into this hobby.

CONTROLLER
First things first if you’re looking at getting into FPV you’ll need a controller. There are several types of control link to your drone. Three of the most common are, FrSky, Spektrum, and Crossfire. Crossfire being the most popular for long range capability. It may seem strange to spend $100-200 on a controller without even having a drone but you’ll be able to use this to get comfortable on the simulator and you’ll be able to link it to several drones. I currently fly with the older version of the TBS Tango 2

SIMULATOR
Before taking flight with your aerial weed wacker, I recommend testing out a computer simulator. I can personally recommend Velocidrone. This software offers a few levels to play around in as well as the ability to make adjustments to your virtual drone, namely adjusting the camera angle. You’ll quickly find where you’re preferred camera angle is, better to determine this with a reset button at hand. There are of course several other simulators out there, this just happens to be the one I know.

GOGGLES
When it comes to goggles there are two basic types. Analog and Digital. The most common analog goggle maker is Fatshark and for digital you’re looking at a DJI system. The upfront cost is pretty similar between the DJI and high end Fatshark system, though replacement DJI cameras are about 3x as expensive. There are plenty of reviews out there as far as the quality differences between the two. I’m definitely interested to try the DJI system, but I already have an analog setup on four drones so I’ll be analog for a minute.
THE DRONE
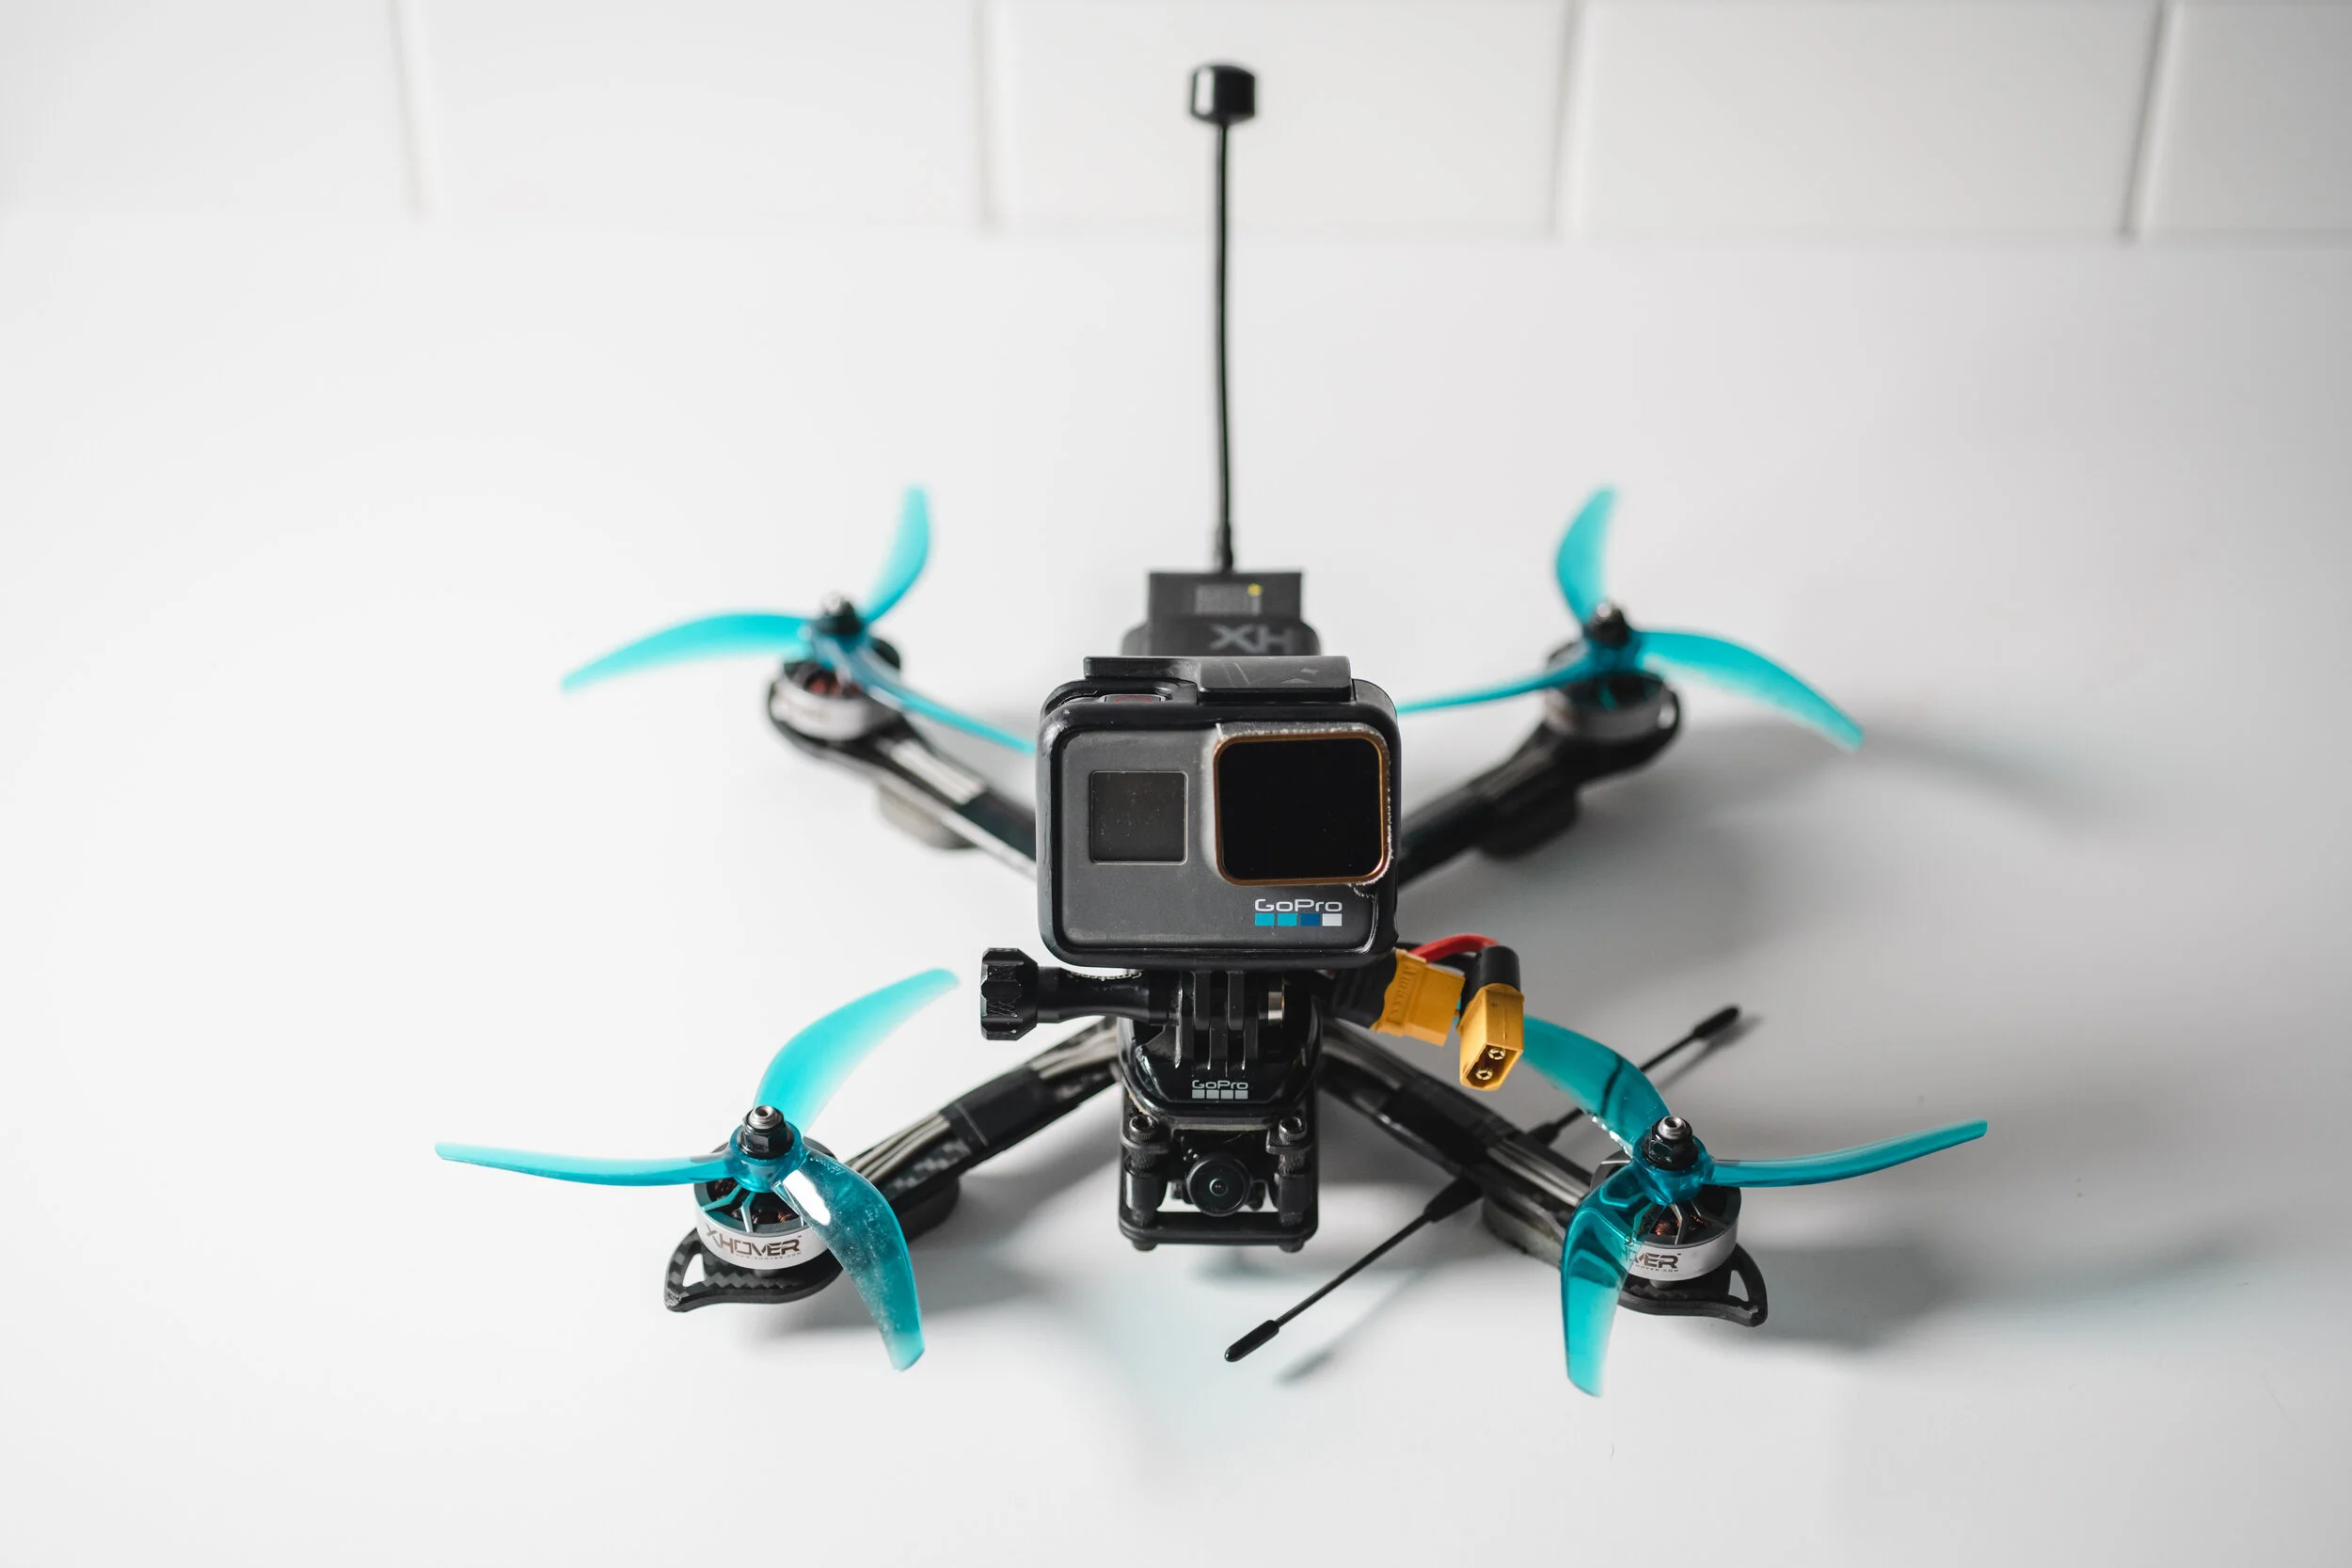
This is where the options really ramp up. The most common FPV filming rig is currently the quad rotor copter with 5” propellers. The frame and parts availability for 5” mini quads is huge, these little drones are plenty capable of high speeds and aerobatic maneuvers while carrying a GoPro or two. I started my FPV hobby with an xhover Stingy.
There is also a growing availability of ducted propeller quads that can carry a GoPro while flying indoors in close proximity to people, without the concern of exposed propellers. There are of course a variety of options both bigger and smaller.
Companies like Xhover and Diatone offer their quads as frames to build out yourself or Bind-n-fly versions that allow you to pair a prebuilt drone with your own controller and goggles.

DO IT YOURSELF
Even if you choose to go the bind-n-fly route you’ll still want to know the parts that make your drone so you can replace them after a crash…and you will crash, a lot. Below I’ll list out the essential components to an FPV drone.
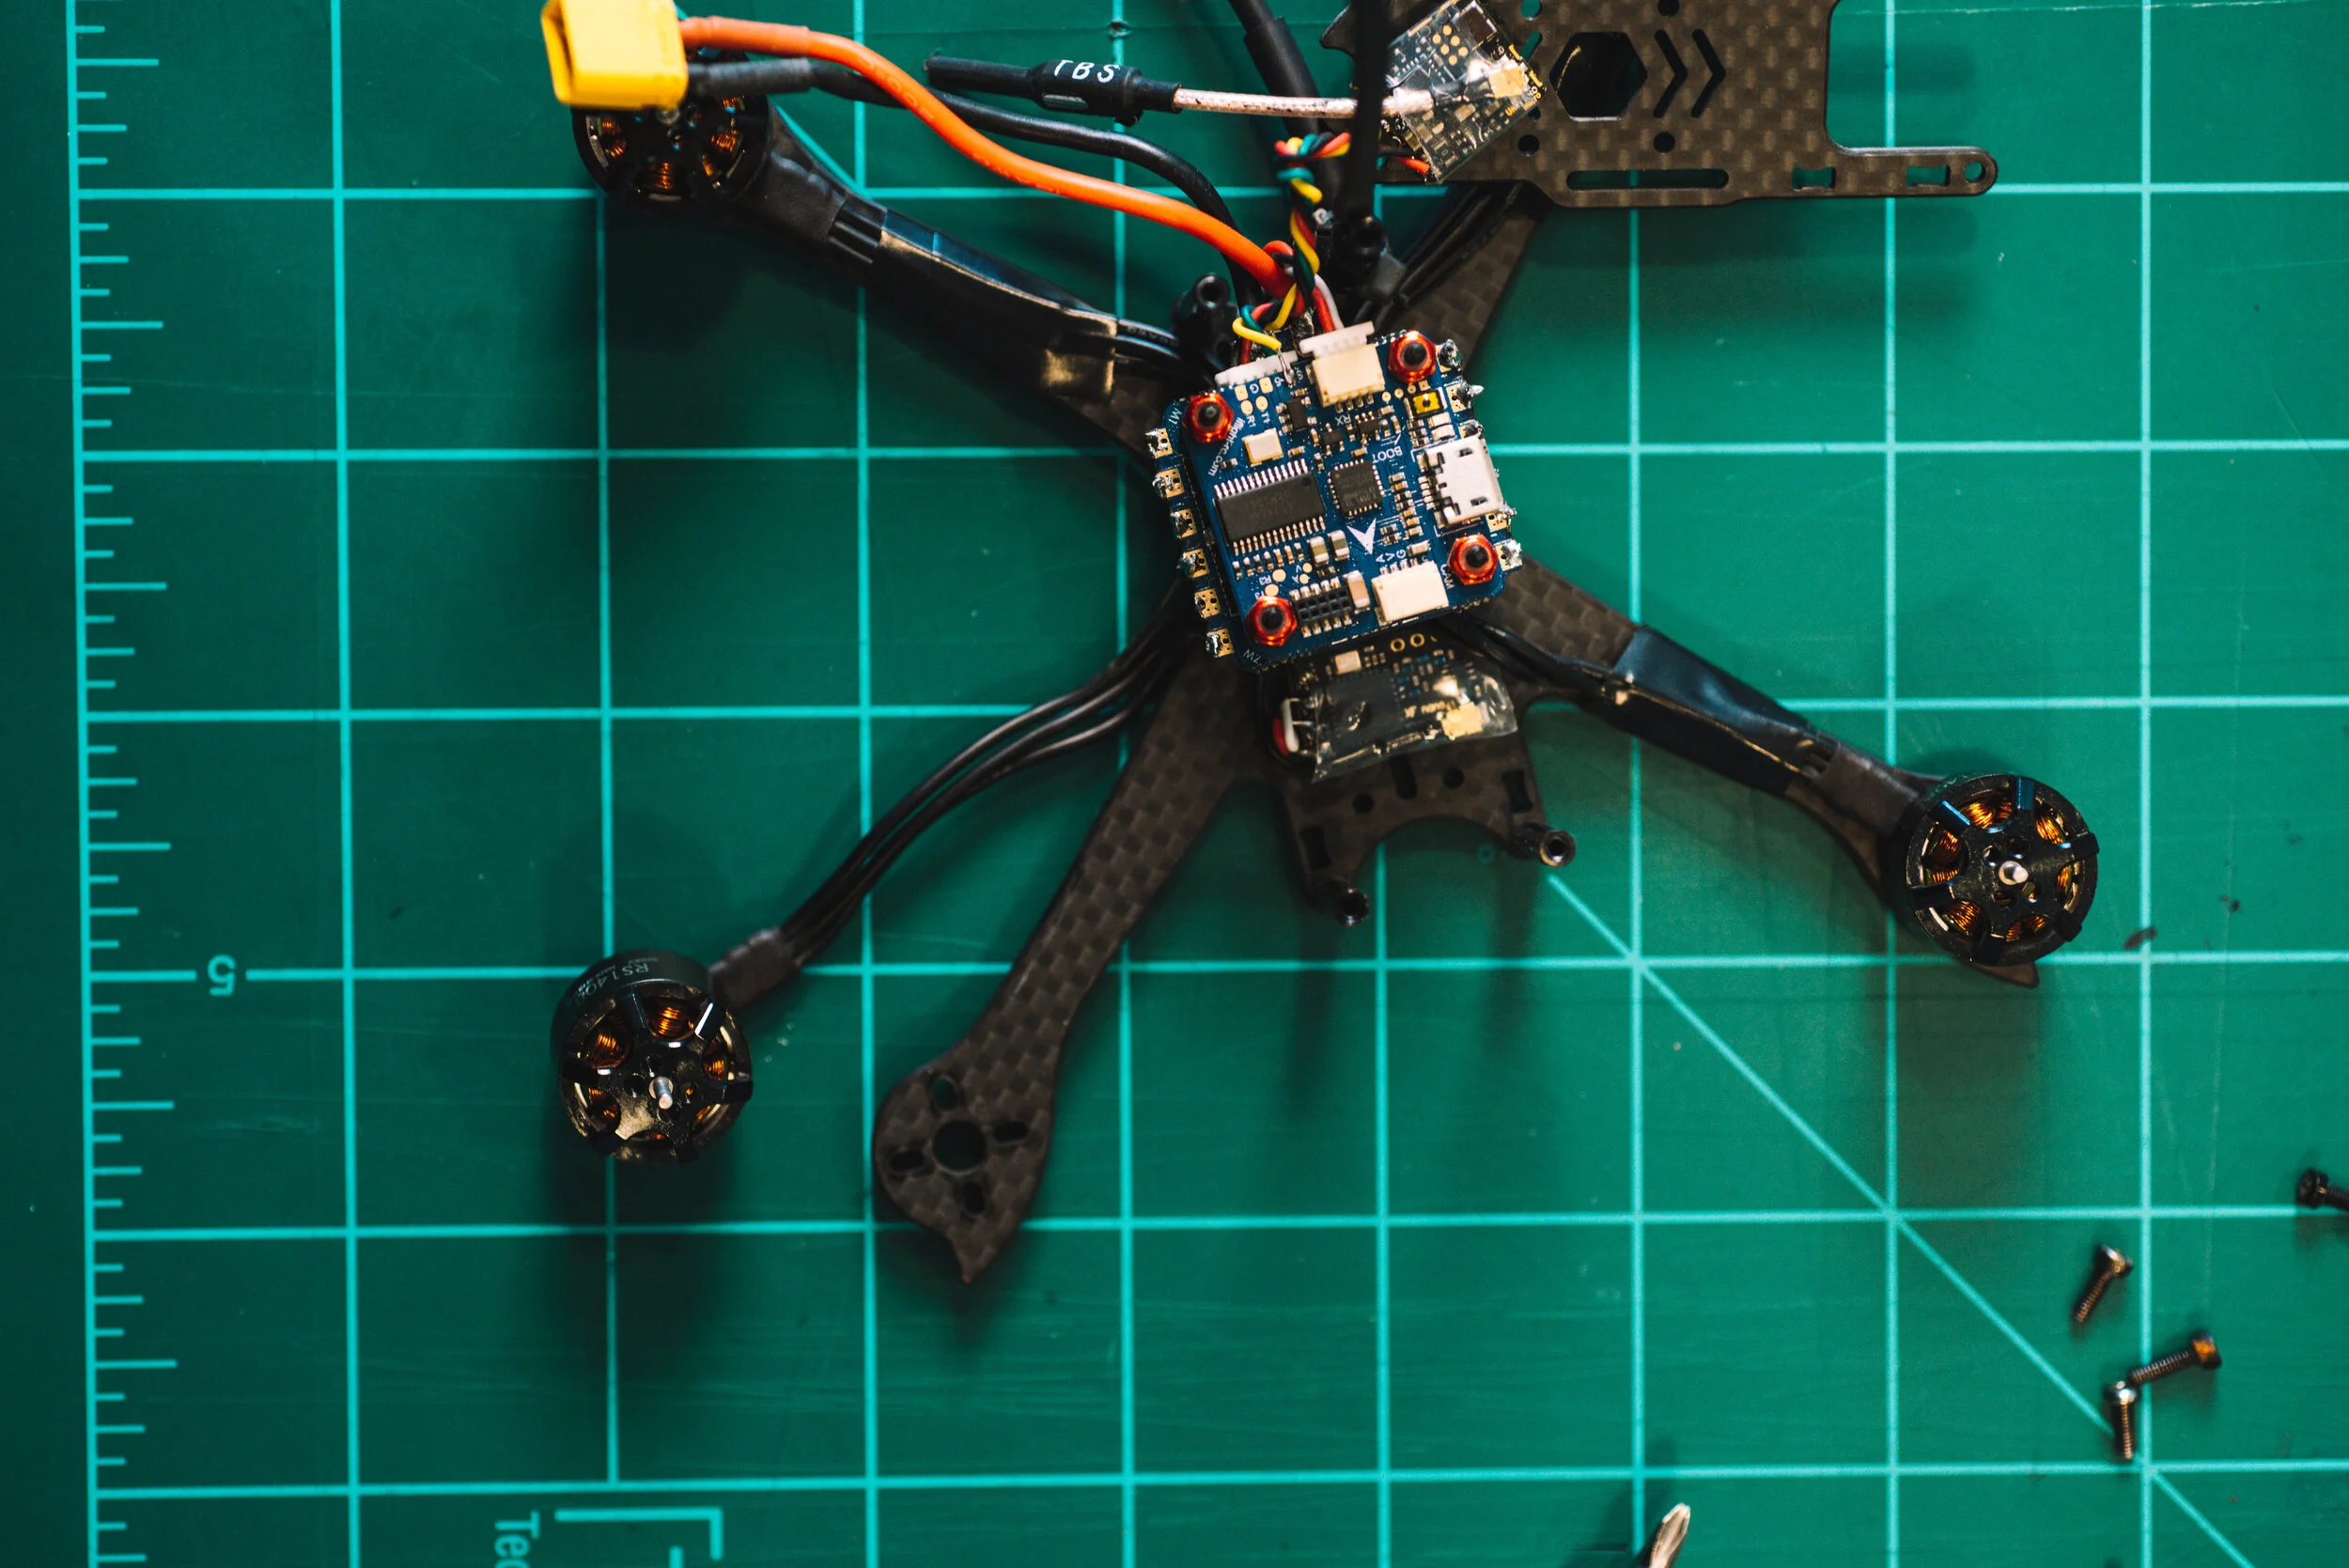
FRAME
The size and shape of your frame will determine your motor and propeller size. For a first build I’d recommend a 5” frame as it’s essentially the baseline for FPV at the moment. The Xhover Stingy is where I started.

FLIGHT CONTROLLER
/ESC
The flight controller is the brains of your drone and there are a few primary operating systems, Betaflight, KISS, and Flight One. The Electronic Speed Controller works in tandem with the FC to control the speed of each motor. These parts can be purchased separately but I’ve found it simpler to purchase them together in a stack.

RECEIVER
The receiver is wired into the FC and relays inputs made from the controller. The receiver needs to match your controller’s communication type. Be it, Crossfire, FrSkye, or Spektrum. My quads are all running TBS Crossfire Nano.

VIDEO TRANSMITTER
The video transmitter or VTX is what sends the video signal from the camera to your goggles. For analog just about any manufacture will work so long as they’re both 5.8GHz or 2.4GHz. If you’re running a DJI system you’ll need a DJI specific VTX. Most of my rigs are running TBS Unify Pro or Nano.

FPV CAMERA
Again for DJI users the answer here is of course DJI. But to all those on the analog train there’s a wide world of FPV cameras available. I’ve been happy with the Foxeer Falkor with 1.8mm lens. Foxeer just released their new Razer Nano.

MOTORS
When you buy motors be sure to buy a few spares. The two numbers you’ll see on the motor are the stator size and KV. The other thing to note is different battery cell counts will call for different motors. A common motor for a 5” 4S rig would be a 2207-2500kv motor. A comparable 6S motor would be a 2207-1800kv.

BATTERIES
The big thing to know about batteries is cell count. The two most common cell counts for FPV are 4S and 6S. When building or buying a quad you’ll want to make sure all of your parts are compatible with your cell count of choice. 6S will give you more power and flight time but with a slightly heavier and slightly more expensive build. The XT60 connector is the most common battery connector in the FPV world.
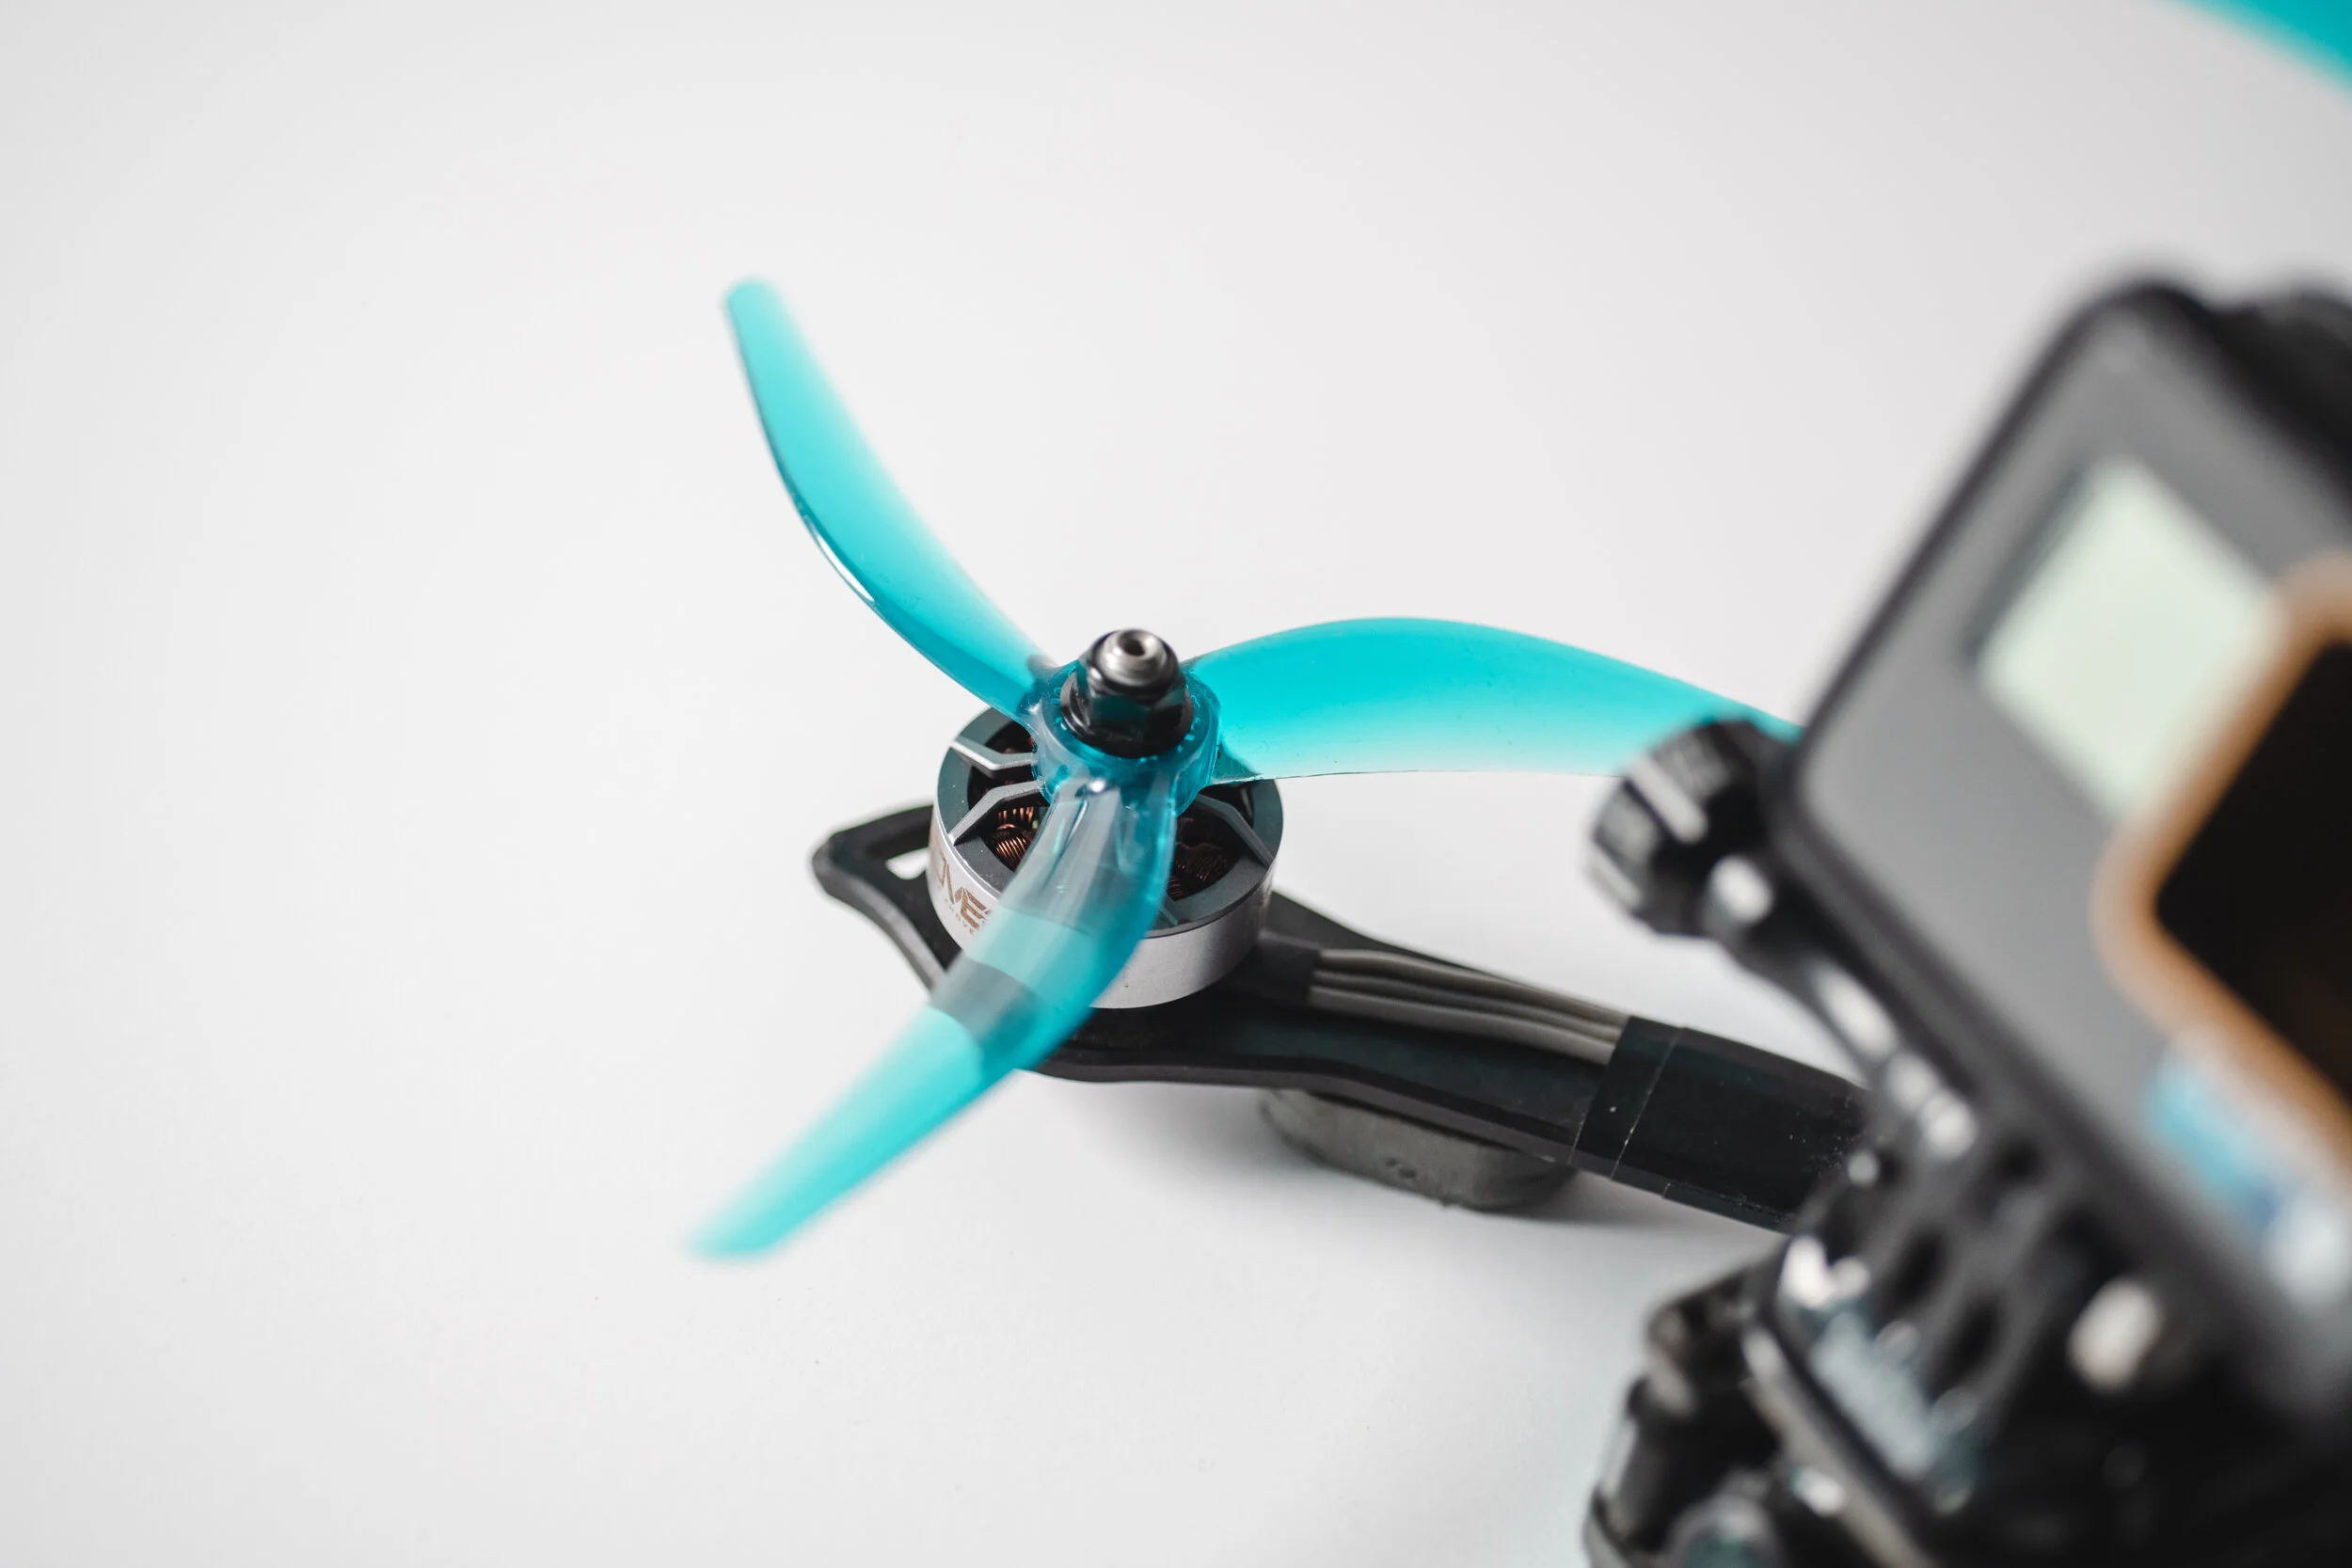
PROPELLERS
Buy in bulk. FPV propellers are pretty cheap so find a prop you like and buy a bunch of them. Higher pitch will give you more bite but a little less throttle resolution as a result. Try a variety and see what works for your style. I’ve been really happy with Azure’s Johnny FPV propellers on my 5” quads.

GOPRO
When it comes to the recording camera I recommend the GoPro Hero 6 and Polar Pro ND filters. I run the Hero 6 because you can find them for under $175 they shoot 4k 30fps @ 4:3. The trick is to run the footage through Reelsteady Go to smooth out the footage.
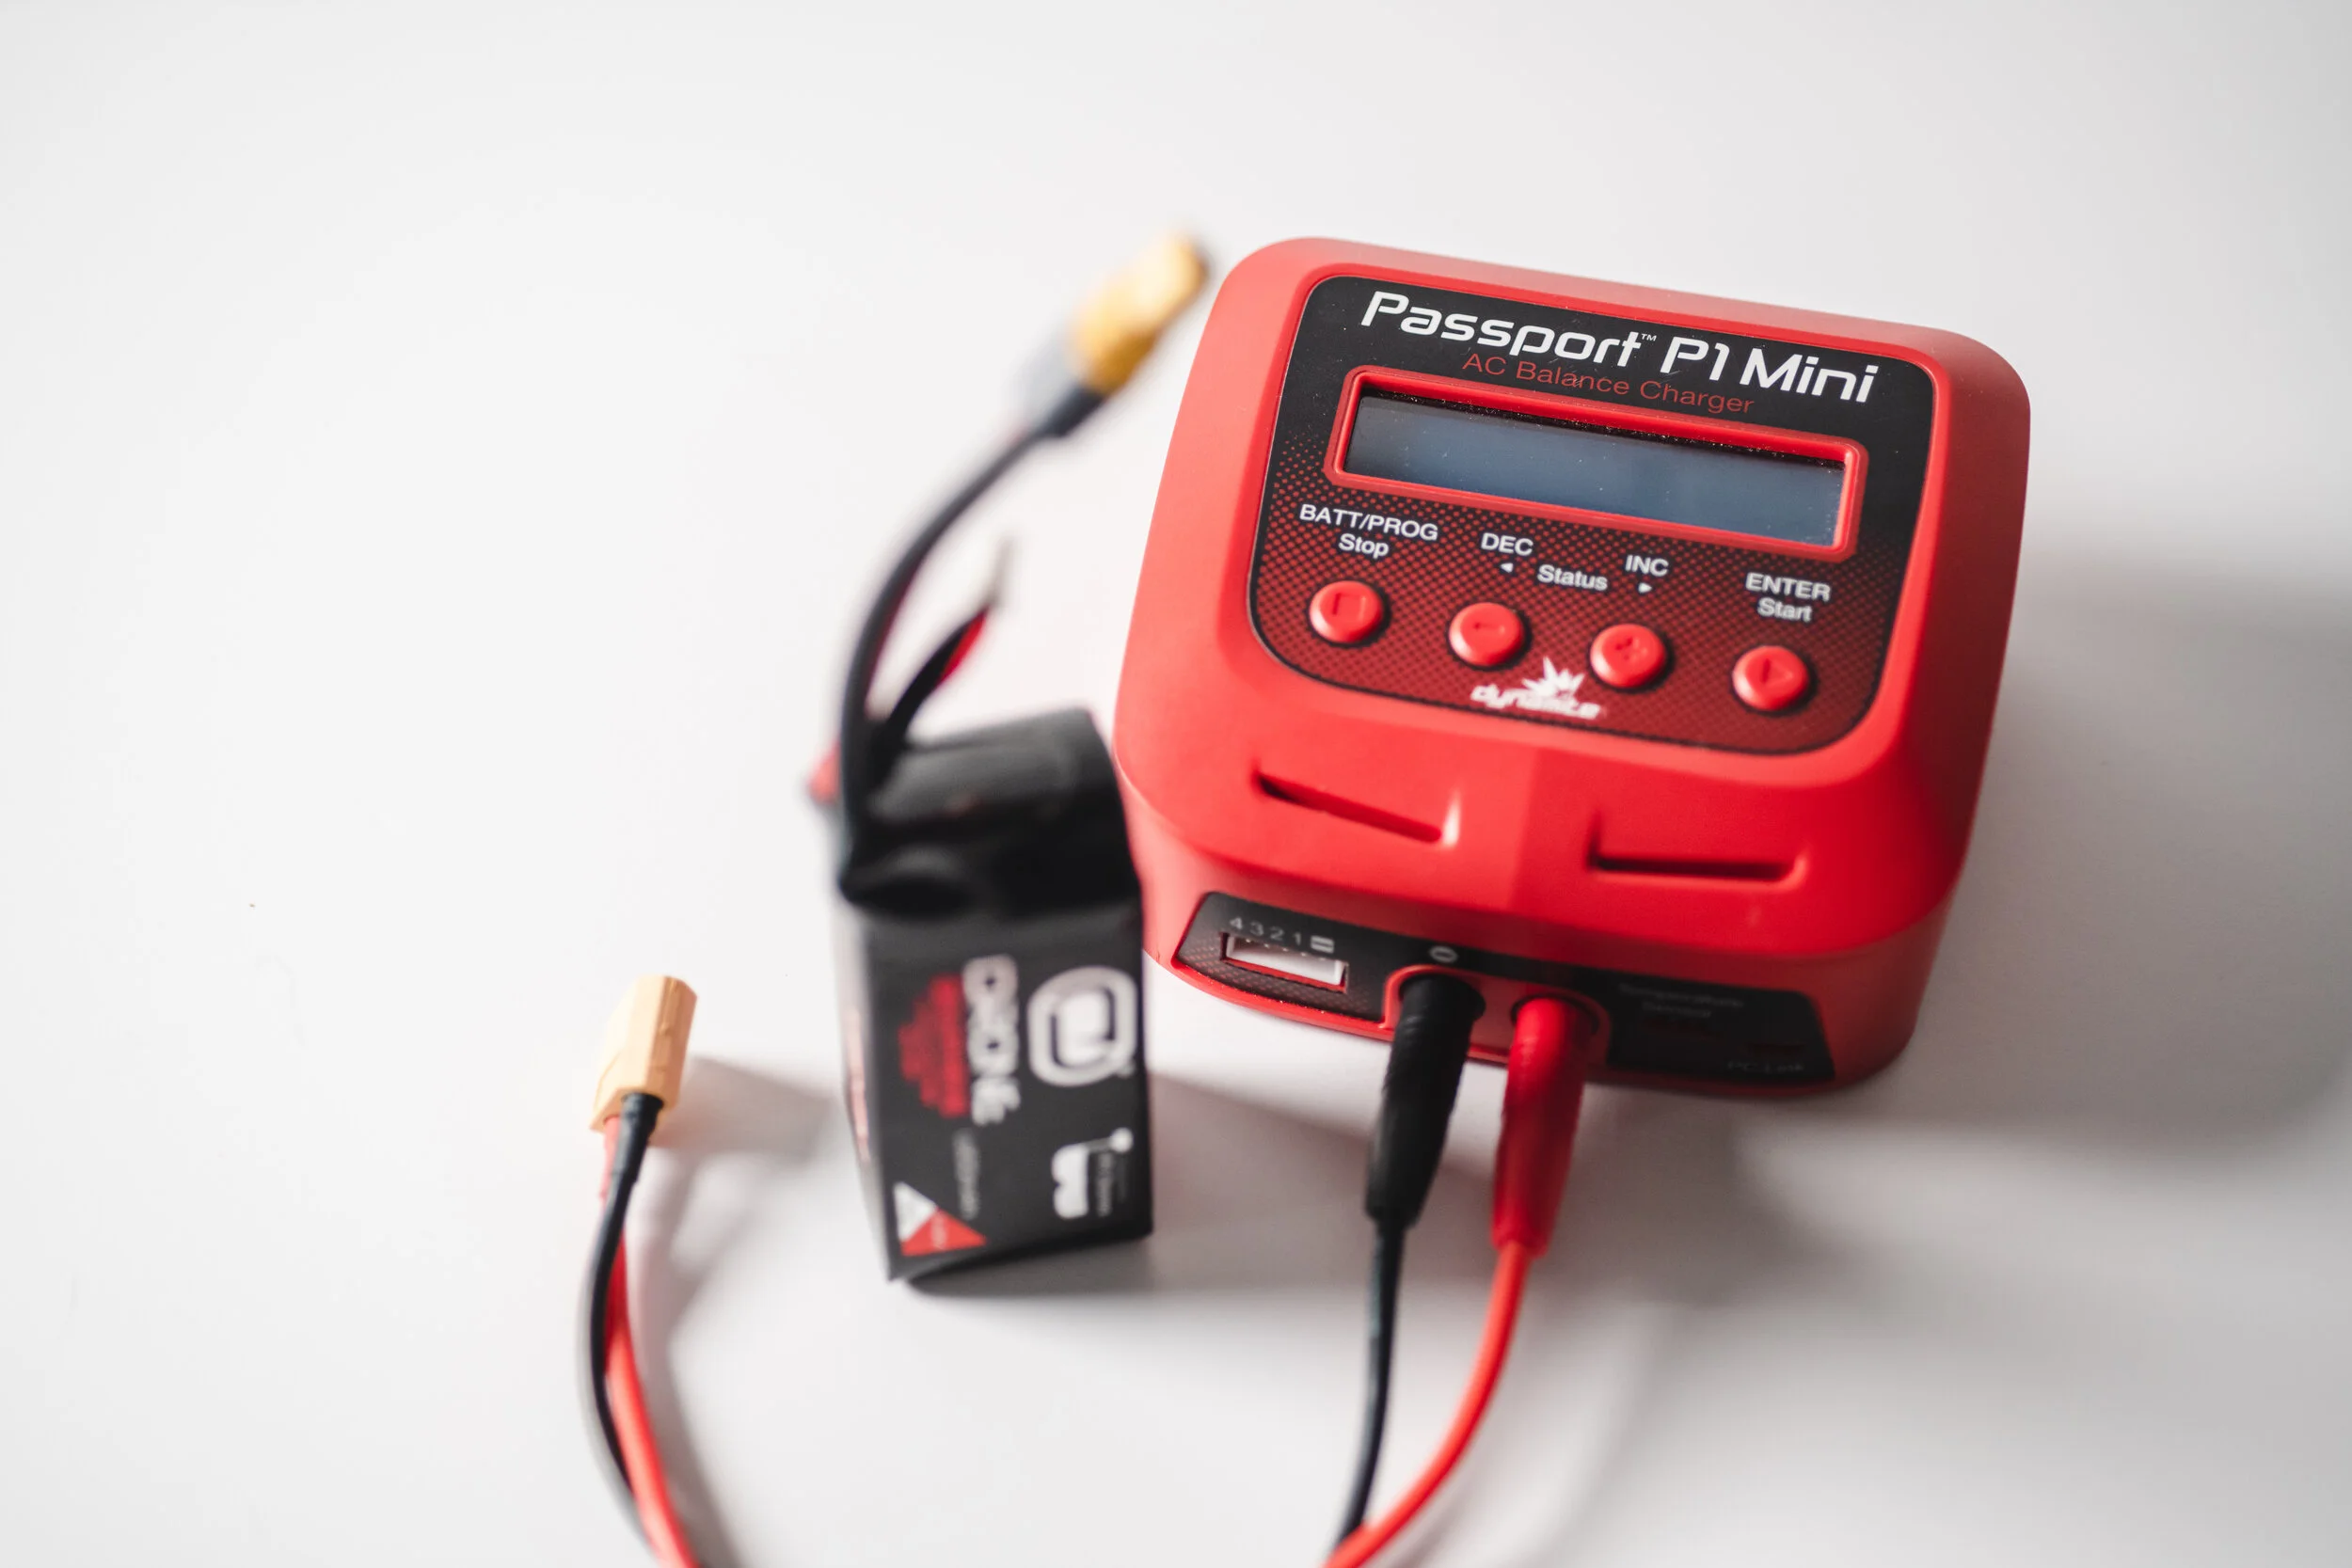
CHARGER
There’s a huge range of chargers available but for getting started you can go with something small and simple like this Dynamite Passport.